Introducing PrintCSS Cloud

Today I want to talk to you about my latest project, PrintCSS Cloud, an HTML to PDF REST API. Another HTML to PDF API you might ask, yes! Other APIs usually lack even minimal CSS Paged Media support. Some of them support the @page rule and nothing else. PrintCSS Cloud supports most of the features defined in CSS Paged Media. This works because there is not only a headless Chromium used to generate the PDFs but three of the most advanced OpenSource rendering tools, WeasyPrint, PagedJS, and Vivliostyle!
The Print CSS features covered thanks to these renderers are:
- Running Headers and Footers: This feature is supported by two of the three rendering tools, WeasyPrint and PagedJS. Have a look at a sample document on printcss.live.
- Counters and Cross References: CSS counters and the target-counters property can be used with WeasyPrint and Vivliostyle; again, there is a sample document on printcss.live.
- Page Margin Boxes: 16 Page Margin Boxes are waiting for your content in all three rendering tools, have a look on printcss.live to see how this is working.
- Footnotes: Does your PDF need footnotes? Then it would be best if you rendered with Vivliostyle; this renderer offers basic footnote support. See a sample on the PrintCSS Playground.
- Page Selectors and Page Breaks: The best support for page selectors like
@page:blankyou get with WeasyPrint, but no worries, the other tools support the most selectors too! See it in action on the PrintCSS Playground. - JavaScript Support: PagedJS and Vivliostyle both handle JavaScript just like your browser would do. Why? Because they also use a headless Chromium in the background but have a layer on top to support the modern CSS Paged Media features.
The API is currently in alpha status, and I would really appreciate your feedback! Till the final Go-Live, I only have a free plan including 500 requests per month, which should be more than enough to give you an idea of the possibilities and test the API. If you still need more requests for testing, please let me know.
But now, let us see how to work with the API. To send a request to the API, you need to subscribe to a plan on RapidAPI. With this, you get the API key that is required to authenticate with the REST service.
#A simple request with HTML and CSS

To create a PDF from your HTML, you need to pass both HTML and CSS code in a JSON structure as the body of the POST request to the API. The JSON structure you need to send should look like the following:
{
    "html": "",
    "css":  ""
}
Now let us assume you have the following HTML and CSS code.
<!DOCTYPE html>
<html>
    <head>
        <meta charset="UTF-8">
        <title>Basic Example</title>
        <link rel="stylesheet" href="style.css" />
    </head>
    <body>
        <h1>Hello PrintCSS Cloud!</h1>
    </body>
</html>
The style.css, mentioned in the HTML code, only sets the color of the H1 element to blue.
h1 { color: blue; }You will only need the HTML, which is in between the BODY tag. The rest can be skipped. So the same content in your JSON structure would look like this:
{
    "html": "<h1>Hello PrintCSS Cloud!</h1>",
    "css":  "h1 { color: blue; }"
}
All you need to do to get the PDF is to send one POST request to the API and not forget to add your RapidAPI authentification key.
curl --location --request POST 'https://printcss-cloud.p.rapidapi.com/render' \
--header 'x-rapidapi-host: printcss-cloud.p.rapidapi.com' \
--header 'x-rapidapi-key: YOUR_API_KEY' \
--data-raw '{
    "html": "<h1>Hello PrintCSS Cloud!</h1>",
    "css": "h1 { color: blue; }"
}'
The same request in PHP would look like this:
<?php
$curl = curl_init();
curl_setopt_array($curl, [
    CURLOPT_URL => 'https://printcss-cloud.p.rapidapi.com/render',
    CURLOPT_RETURNTRANSFER => true,
    CURLOPT_ENCODING => '',
    CURLOPT_MAXREDIRS => 10,
    CURLOPT_TIMEOUT => 0,
    CURLOPT_FOLLOWLOCATION => true,
    CURLOPT_HTTP_VERSION => CURL_HTTP_VERSION_1_1,
    CURLOPT_CUSTOMREQUEST => 'POST',
    CURLOPT_POSTFIELDS => '{
        "html": "<h1>Hello PrintCSS Cloud!</h1>",
        "css": "h1 { color: blue; }"
    }',
    CURLOPT_HTTPHEADER => [
        'x-rapidapi-host: printcss-cloud.p.rapidapi.com',
        'x-rapidapi-key: YOUR_API_KEY'
   ],
]);
$response = curl_exec($curl);
curl_close($curl);
echo $response;
and in JavaScript:
var data = "{\r\n \"html\": \"<h1>Hello PrintCSS Cloud!</h1>\",\r\n \"css\": \"h1 { color: blue; }\"\r\n}";
var xhr = new XMLHttpRequest();
xhr.withCredentials = true;
xhr.addEventListener("readystatechange", () => {
    if (4 === this.readyState) {
        console.log(this.responseText);
    }
});
xhr.open("POST", "https://printcss-cloud.p.rapidapi.com/render");
xhr.setRequestHeader("x-rapidapi-host", "printcss-cloud.p.rapidapi.com");
xhr.setRequestHeader("x-rapidapi-key", "YOUR_API_KEY");
xhr.send(data);
As the PrintCSS Cloud API offers the three rendering tools WeasyPrint (default), PagedJS, and Vivliostyle. You can change the tool within your request’s body JSON.
{
    "html": "<h1>Hello PrintCSS Cloud!</h1>",
    "css": "h1 { color: blue; }",
    "options": {
        "renderer": "vivliostyle"
    }
}
As you see in the above request body, the renderer needs to be provided in lowercase. This request would now render the PDF with Vivliostyle instead of the standard WeasyPrint.
#Add JavaScript

PagedJS and Vivliostyle both handle JavaScript just like your browser would do. WeasyPrint does not support JavaScript, so if you pass the javascript key in the request’s body, the default renderer changes to PagedJS. If you pass JavaScript in the HTML directly, you would need to change the renderer yourself, as shown above.
To send JavaScript, either you directly put it in a SCRIPT tag within your HTML or add it in the JavaScript section within the JSON body.
{
    "html": "<h1 id='js'>Hello PrintCSS Cloud!</h1>",
    "css": "h1 { color: red; }",
    "javascript": "document.getElementById('js').style.backgroundColor = 'blue';"
}
The above JS code should set the background color of the header element to blue. Compared to the samples before, the text color in this one got changed to red.
The request looks the same as for the simple HTML and CSS sample just that we added the JavaScript:
curl --location --request POST 'https://printcss-cloud.p.rapidapi.com/render' \
--header 'x-rapidapi-host: printcss-cloud.p.rapidapi.com' \
--header 'x-rapidapi-key: YOUR_API_KEY' \
--data-raw '{
    "html": "<h1 id='\''js'\''>Hello PrintCSS Cloud!</h1>",
    "css": "h1 { color: red; }",
    "javascript": "document.getElementById('\''js'\'').style.backgroundColor = '\''blue'\'';"
}'#Include Images and Fonts without using external URLs
There are two ways to include your images or fonts in the PDF either you have them available via a public URL or provide a base64 encoded ZIP file within the requests body. The ZIP file is the preferred way as you do not need to provide your assets elsewhere. The API supports the following file types for images:
- gif
- jpeg
- jpg
- png
- svg
- bmp
- tif
- tiff
Next to images, the API also supports CSS, JavaScript, and custom Fonts in the assets ZIP if they have one of the file types below:
- css
- js
- woff
- ttf
- otf

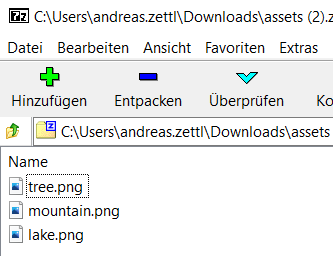
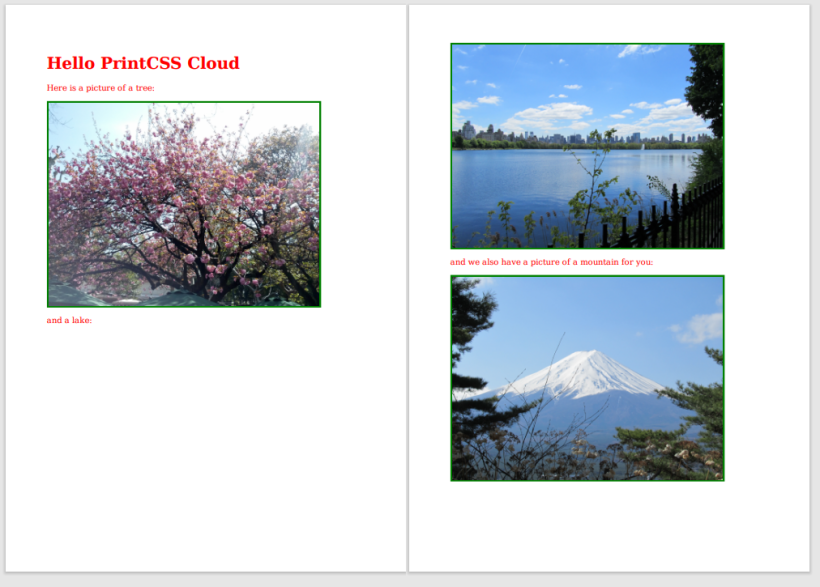
You can reference your ZIP file’s content with relative links inside the HTML, CSS, and JavaScript code that you provide in the request body. Let us say you have a base64 encoded ZIP containing three images, tree.png, lake.png, and mountain.png, and you want to show them in your PDF. The requests JSON body would look like the following:
{
    "css": "body { color: red; } img { display: block; width: auto; height: 400px; border: 4px solid green; }",
    "html": "<h1>Hello PrintCSS Cloud</h1><p>Here is a picture of a tree:</p><img src='tree.png'/><p>and a lake:</p><img src='lake.png' /><p>and we also have a picture of a mountain for you:</p><img src='mountain.png' />",
    "assets": "BASE64_ENCODED_ZIP_FILE_CONTAINING_THE_ASSETS"
}
Sending this request works again the same as mentioned before, so I skip that part here and just show you a screenshot of the resulting PDF.

#Dynamic Content

The PrintCSS Cloud API supports the templating engine Twig for your HTML content. So you can add some dynamic content like the date and time of the PDF rendering or reformat some content, for example, to uppercase. For the full details of Twig’s possibilities, please check their documentation.
A small example of what is possible can be seen in the requests JSON body below.
{
    "css": "body { color: red; }",
    "html": "Hello PrintCSS Cloud<br/>This document was rendered on {{ 'now'|date(timezone='Europe/Paris') }}<br/>{% apply upper %}This text becomes uppercase {% endapply %}"
}
Look at the HTML there are two parts in brackets, the first one will print the current date and time, and the second will transform the text to uppercase.
#Templating
Thanks to Twig, you can also render the same HTML multiple times with different data. Let’s say when you want to create business cards for your whole team or create multiple bills within one document.
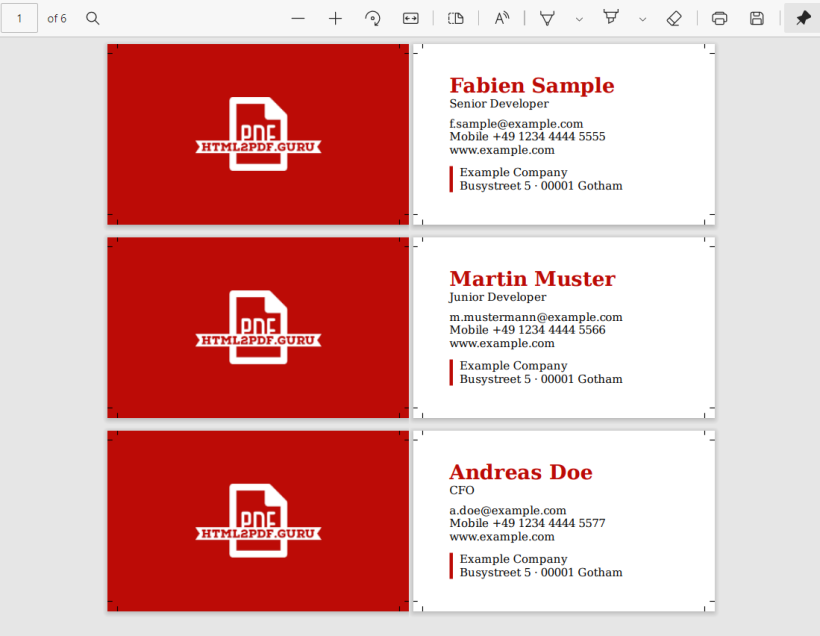
In the JSON body below, you see how to create business cards for 3 different people. The HTML contains placeholders like {{FirstName}} which appear as keys in the single data objects. For each data object, the HTML gets rendered once.
{
"css": "@page { size: 3.5in 2in; marks: crop; bleed: 0.125in; margin: 0.25in; } @page back { background: rgb(188,11,6); background-image: url(https://www.html2pdf.guru/assets/img/html2pdf.guru.png); background-position: center; background-repeat: no-repeat; margin: 0; } body { font-size: 10pt; } b { color: rgb(188,11,6); font-size: 1.5rem; } .head { display: inline-block; margin-bottom: .5rem; } .foot { display: inline-block; margin-top: .75rem; border-left: .25rem solid rgb(188,11,6); padding-left: .5rem; } .break { page: back; page-break-after: always; break-after: always; }",
"html": "<div class='break'></div><span class='head'><b>{{FirstName}} {{LastName}}</b><br />{{Title}}</span><br />{{EMail}}<br />Mobile {{Phone}}<br />www.example.com<br /><span class='foot'>Example Company<br />Busystreet 5 &amp;amp;amp;amp;middot; 00001 Gotham</span>",
"data": [
{"FirstName": "Fabien", "LastName": "Sample", "Title": "Senior Developer", "EMail": "f.sample@example.com", "Phone": "+49 1234 4444 5555"},
{"FirstName": "Martin", "LastName": "Muster", "Title": "Junior Developer", "EMail": "m.mustermann@example.com", "Phone": "+49 1234 4444 5566"},
{"FirstName": "Andreas", "LastName": "Doe", "Title": "CFO", "EMail": "a.doe@example.com", "Phone": "+49 1234 4444 5577"}
]
}The result is an excellent PDF with all the required business cards!

#Asynchronous Requests
All you need to do to send the request asynchronous is set sync to false in the requests body JSON. Here is an example of how you can do this:
{
    "css": "body { color: red; }",
    "html": "Hello PrintCSS Cloud",
    "options": {
      "sync": "false"
    }
}
The response to such an API request will be a JSON with the pdfid:
{
  "pdfid": "OqE89kpPy7LDdwmLza1YKXAxljVwBJ"
}
To check your PDF rendering request status, you can pass this JSON as a request body to the API. So your request body looks exactly like the response:
{
  "pdfid": "OqE89kpPy7LDdwmLza1YKXAxljVwBJ"
}
As a result, you either get the PDF if the rendering is finished. Or a JSON object telling you your rendering request is still open, in progress, or ran into an error. A sample of such a return can be seen below.
{
    "pdfid": "OqE89kpPy7LDdwmLza1YKXAxljVwBJ",
    "status": "in_progress",
    "message": "PDF rendering is currently in progress"
}
In the end, I just wanted to say again that I would really appreciate your feedback! Let me know what you think about the API, how your testing went, and what should be improved or added in the comments below.